

Every fall, decorating our porch with pumpkins is one of my favorite family traditions. I love creating a warm, welcoming space that feels festive and seasonal. This year, I wanted to try something new and create a tall, stacked pumpkin display for our front porch. I’ve always admired those beautiful pumpkin towers, but I never knew how people managed to get them to stay balanced and secure.
That changed when I discovered the Stack-O-Lantern Kit from Hey Buddy Hey Pal. This clever kit is designed for both carved jack-o’-lanterns and uncarved pumpkins, making it versatile for any fall decorating style. After trying it myself, I’m sharing my best tips for how to stack pumpkins on a porch and what I learned along the way.
Step 1: Choose the Right Pumpkins
When stacking pumpkins, size and shape matter more than you might think. To create a stable, eye-catching tower, follow this basic structure:
-
Start with a large pumpkin on the bottom. The larger your base pumpkin, the sturdier your stack will be. Look for one with a wide, flat bottom.
-
Use a medium pumpkin in the middle. The middle layer should fit snugly on top of the base pumpkin.
-
Finish with a smaller pumpkin on top. A lighter pumpkin prevents the tower from becoming top-heavy.
-
Prioritize flat surfaces. Flat bottoms and smooth tops help the pumpkins sit evenly.
If you plan to carve your pumpkins later, choose firm ones without soft spots, as they hold up better over time.
Step 2: Use the Stack-O-Lantern Kit for Secure Stacking
The Stack-O-Lantern kit comes with everything you need to carve, clean, and safely stack your pumpkins, including:
-
Two plastic stackers
-
One lid light
-
Three battery-powered tea lights
-
One scooper
-
One saw
Here is a photo of the supplies:

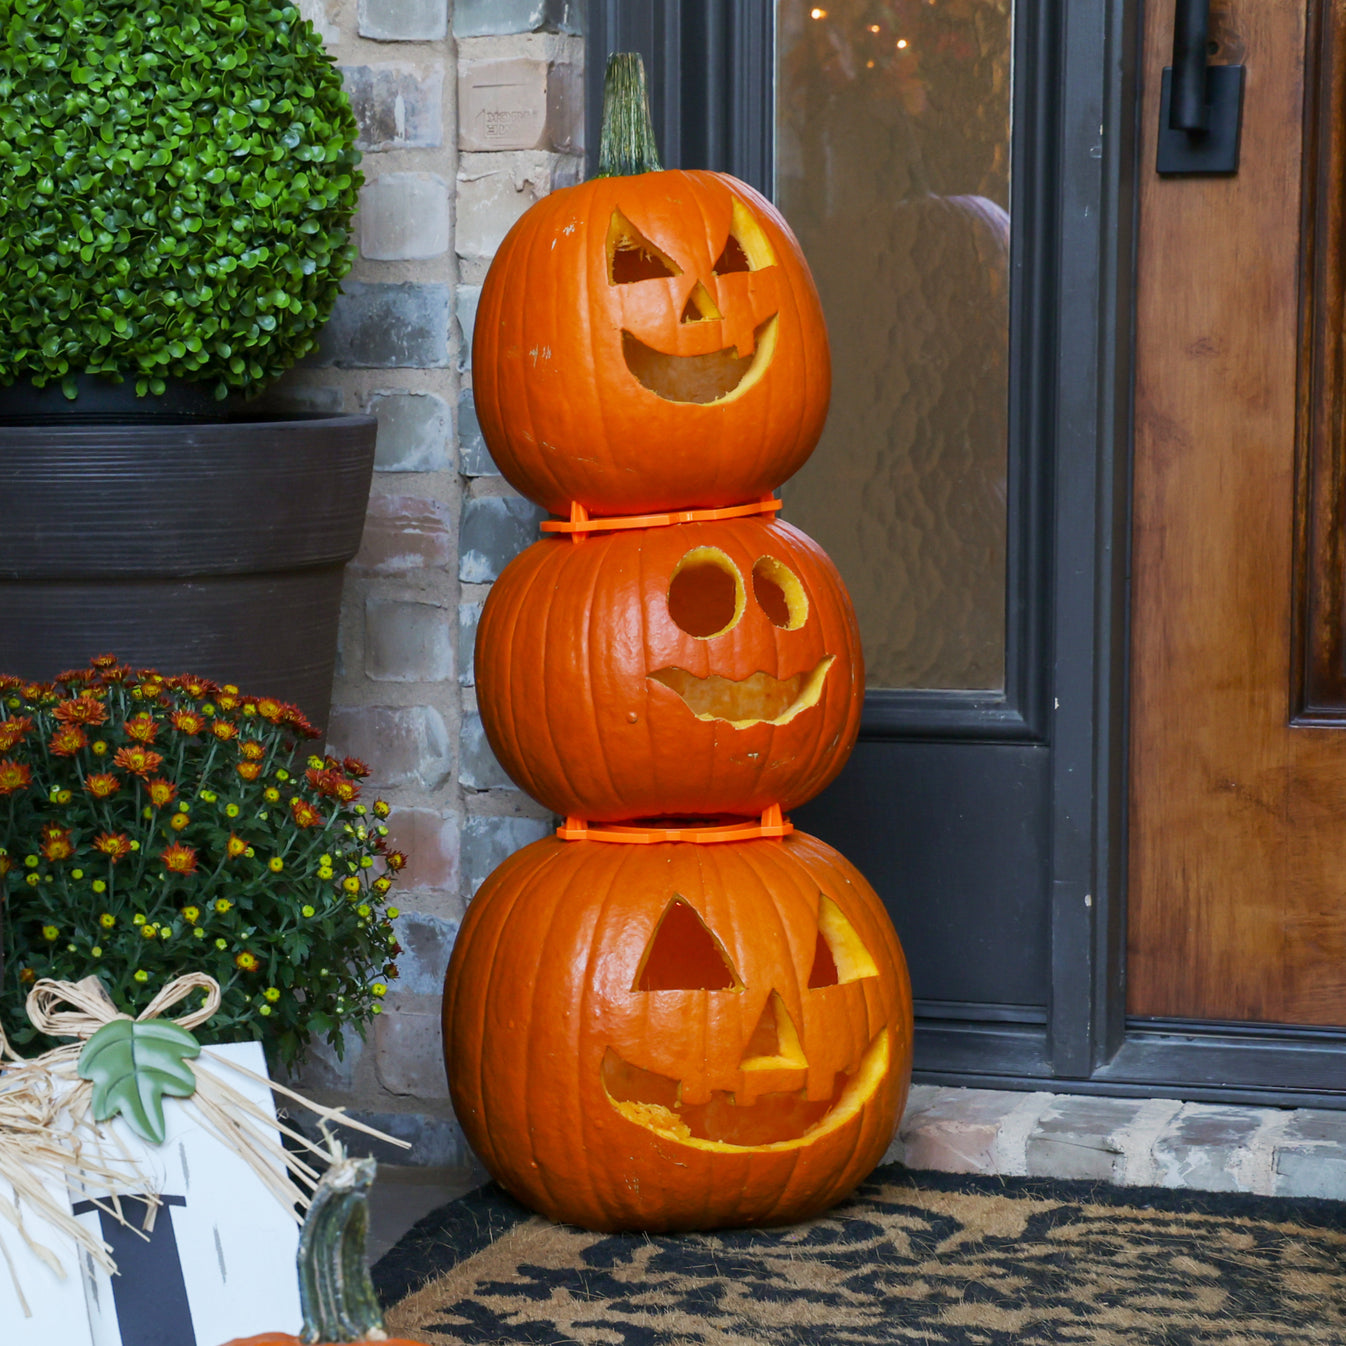
The plastic stackers are the key to creating a secure tower. They fit onto the rims of your pumpkins and keep each layer steady, so you don’t have to worry about them slipping or shifting. Once everything was in place, my pumpkin stack felt surprisingly solid, even on a porch that sees a lot of foot traffic.
This kit works with both carved pumpkins and uncarved pumpkins, so you can create either a glowing jack-o’-lantern tower or a simple stacked display for fall.

Step 3: Add Light for a Cozy Glow
One of my favorite parts of this project was adding light to the pumpkins. The Stack-O-Lantern kit includes battery-powered tea lights and a lid light that give off a soft, flickering glow. I placed the tea lights inside the lower pumpkins and used the lid light for the top one.
If you’re carving your pumpkins, the lights bring your designs to life safely and without using candles. If you prefer uncarved pumpkins, the lights still add a warm, welcoming touch to your porch décor.
Step 4: Pick the Perfect Spot on Your Porch
Even with a secure stacking system, placement matters. Choose a flat, level area on your porch or patio to prevent wobbling. Avoid high-traffic spots where people or pets might accidentally bump the display.
If your porch isn’t perfectly level, place a thin doormat, outdoor rug, or piece of wood underneath the base pumpkin to stabilize it. I placed ours near the front door and surrounded it with potted mums and a plaid blanket, which made the whole setup feel cozy and inviting.
Step 5: Get Creative with Pumpkin Styles
Once you know how to stack pumpkins, there are endless ways to customize your look. A few ideas to try:
-
Classic Orange Stack: Keep it traditional with all orange pumpkins for a timeless fall look.
-
Ombre Pumpkin Stack Design: Use white, green, and orange pumpkins arranged from light to dark.
-
Halloween Faces: Carve each pumpkin with a unique expression for a playful display.
-
Neutral Fall Look: Stack uncarved pumpkins and wrap a burlap ribbon or twine around the layers for a farmhouse touch.
Because the Stack-O-Lantern kit works with both carved and uncarved pumpkins, you can easily switch up your look year after year.
Final Thoughts
If you’ve ever struggled to balance pumpkins or wanted to create a stacked display without frustration, the Stack-O-Lantern kit is a must-have. It makes the process simple and is fun for the whole family.
Lean More
You can learn more or order your own Stack-O-Lantern kit here.
.jpeg)


No comments :
Post a Comment